Process
Clients who haven’t worked with animators before, often ask about my process.
Here’s a start to finish case study of a real project to show how I work.
Animated Christmas Card 2021 - Justification Global Translation
The brief was to create a 20 second animation to send out to all their clients. They supplied the idea of a brussels sprout rolling down a wintery hill, which gathers snow until it eventually becomes a globe. They also supplied the music (earworm alert…), which was very useful to have from the start of the project, because it enabled me to gauge the pace and timing.

1. Storyboard to Animatic
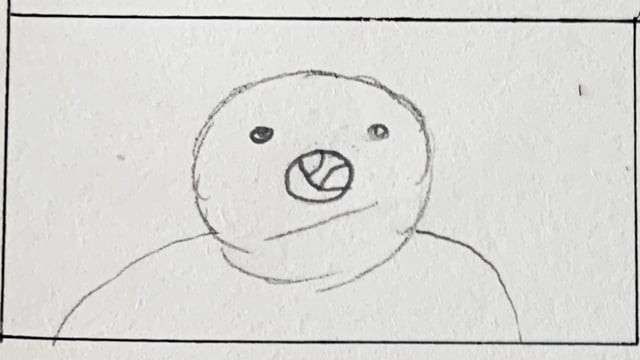
The first stage is to create a storyboard. I suggested the brussels sprout could be a snowman’s nose. The client liked this so I sketched out a rough storyboard of nine frames for them to approve.
Then I created an animatic using the storyboard to demonstrate how each keyframe could be timed to the music - which I edited down to 15 seconds.

2. Moodboard
The next stage is to decide how the design and style of the final animation will look.
Some clients supply their own moodboards, but for this project I had to create one because they were unsure of what colours and style they wanted. It’s good to get everyone involved inspired by existing designs that can be found online.
Justification decided they liked the top left and bottom right images.

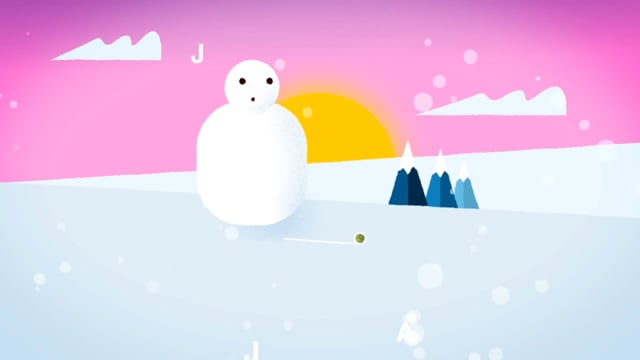
3. Styleframes
The next stage is to create the final design to be animated. The Client said they liked the idea of using pink somewhere, so I used this for the wintery sky. They also requested that the brussels sprout roll from left to right, which of course makes more sense!
This styleframe was the first one I sent for approval. I explained that additional textures and final touches (falling snow etc) could be added once this simple design was approved. You can see this in the second styleframe. (They also requested several global glyphs be used as snowflakes.)
In a more complex animation with multiple scenes, I would send more styleframes for approval before animating. However, for this project, there’s only one simple scene so it made sense to dive straight into the animation.

4. Animation
Once the styleframes are approved, I’ll start the animation process. This starts with basic movement of all elements to get a sense of pace and timing. This is known as ‘the first pass’. I’ll send the various sections of the story for approval to ensure the client is happy.
Once the ‘first pass’ has been approved, I’ll keep tweaking and improving on what I’ve done, sending out a 2nd, 3rd etc pass until everyone is happy.
The final stage is to add special effects like glows, falling snow and animated textures. The client signs it off and is chuffed to bits that they hired Manalishi to deliver another quality project :)